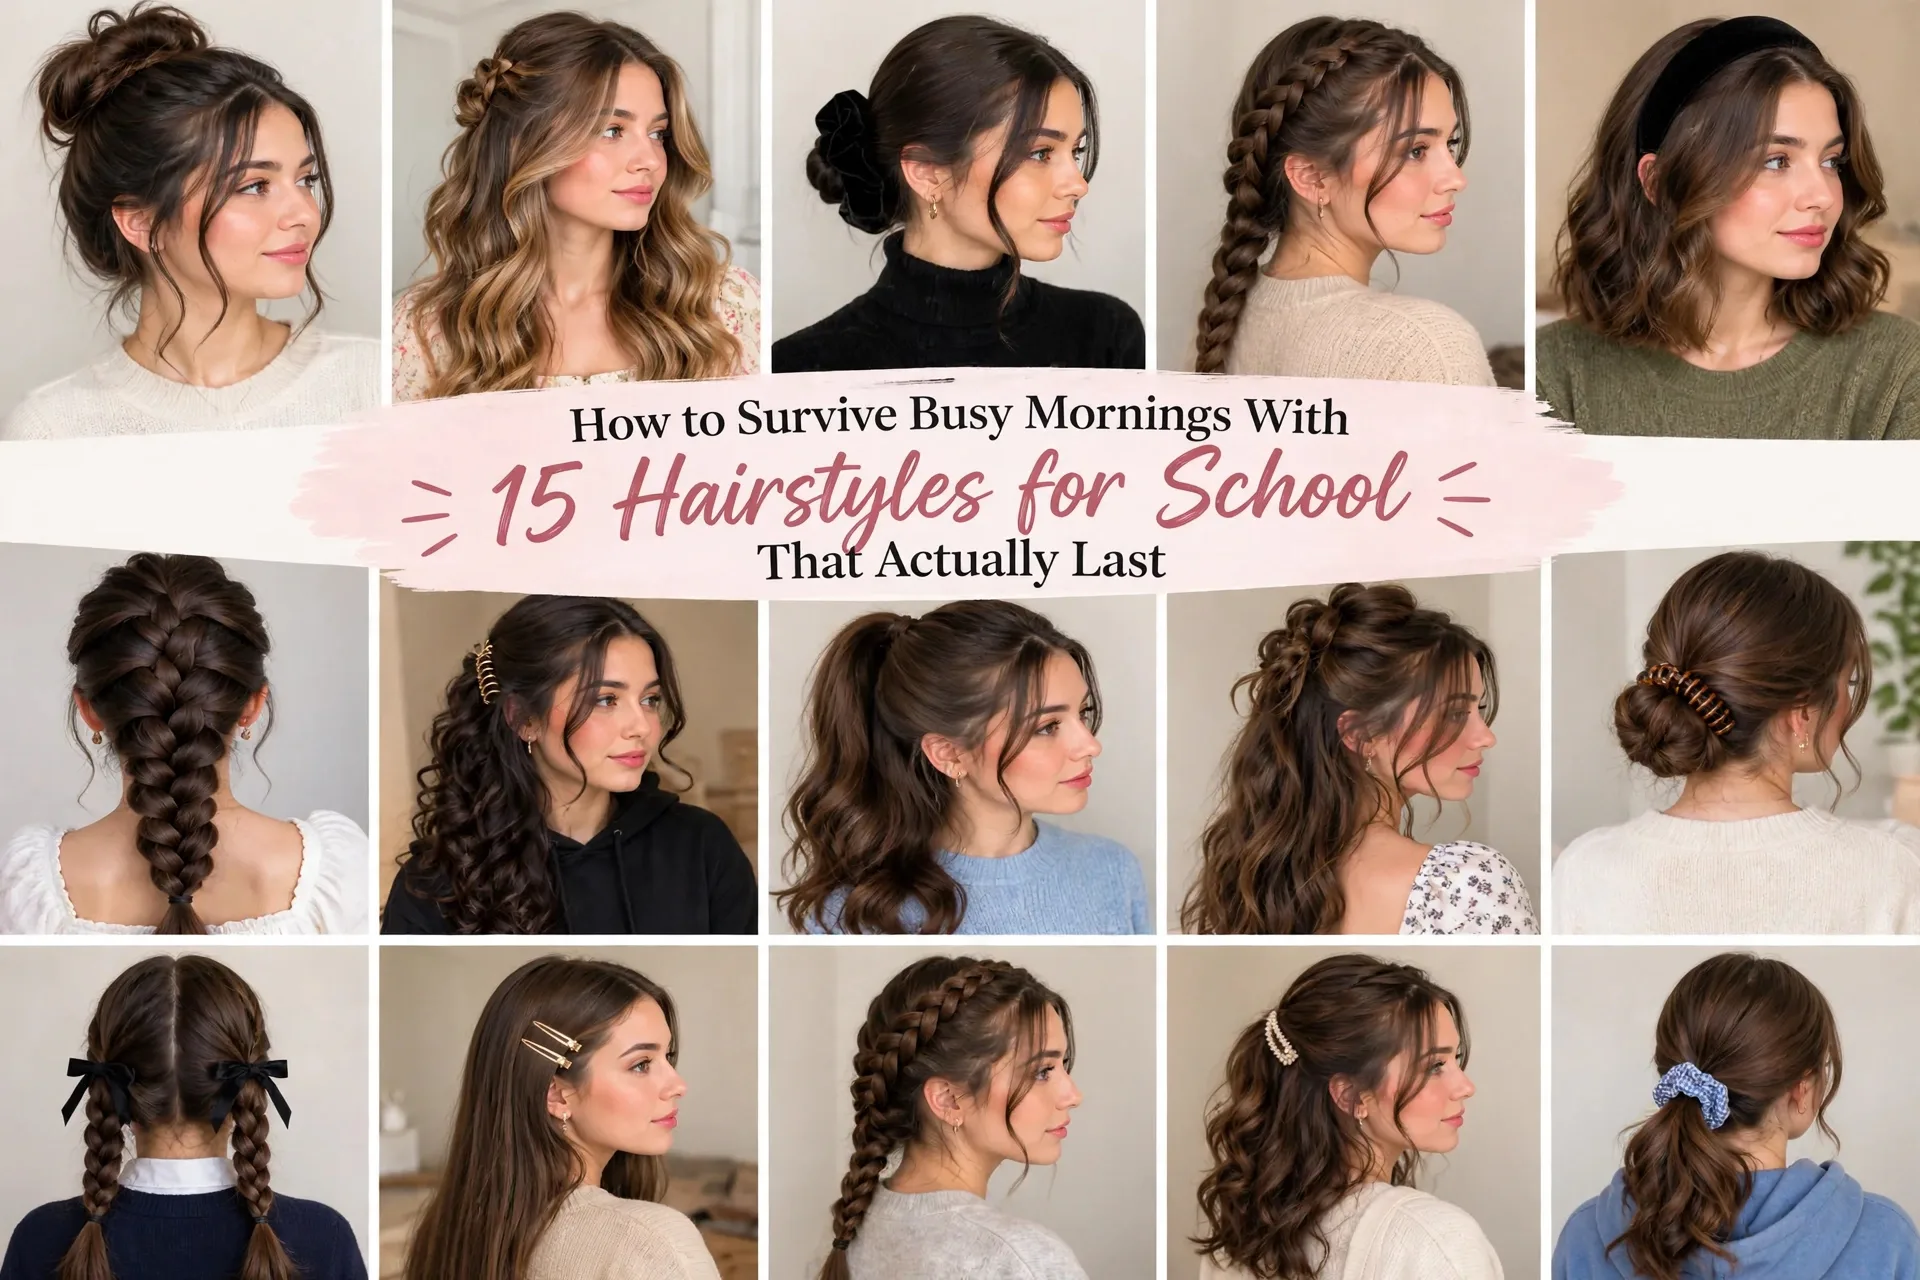
How to Survive Busy Mornings With 15 Hairstyles for School That Actually Last
It’s 7:42. The bus comes at 7:55. Hair is half brushed, one shoe is missing, and the style you saw online last night suddenly looks impossible.
Whether you’re getting a younger child ready or rushing to class yourself, school mornings rarely leave much time for complicated hair.
The good news is that great hairstyles for school don’t need to be complicated. They just need to stay neat through class, recess and the walk home. Some take three minutes. Others are installed before the school week, so mornings need almost no effort for a while.
Below you’ll find 15 styles for kids, teens and older students, plus a realistic time guide, a few night-before habits, and the mistakes that make hair fall apart by lunch.
Find Your Style by How Much Time You Have
Be honest about your mornings. Ten minutes on paper is often four in real life.
- Under five minutes: French braid into a ponytail (with practice), pinwheel bun, lace-up ponytail, spiral-wrapped ponytail
- Around ten minutes: mini bun mohawk, feather braid, mini ponytail crown
- Needs more practice first: zipper braid, five-strand braid, cobra braid ponytail, basket weave updo
- Evening or wash-day styling: flat twists
- Salon styles done before the school week: passion twists, lemonade braids, stitch braids
That last group isn’t for school mornings at all. Book them on a weekend or during a break, and enjoy easier mornings afterward.
A Few Night-Before Habits Worth Building
These small things make every style on this list easier.
- Lay out your tools. Brush, elastics, bobby pins and whatever styling product suits your hair, all in one spot.
- Sleep on a satin pillowcase or bonnet. It means less friction, less frizz and fewer tangles in the morning.
- Detangle gently before bed. Use a suitable brush or wide-tooth comb and work through knots from the ends upward. It reduces pulling and breakage.
- Keep spare elastics in your backpack. One snaps at lunch, and you’re covered.
Now for the styles.
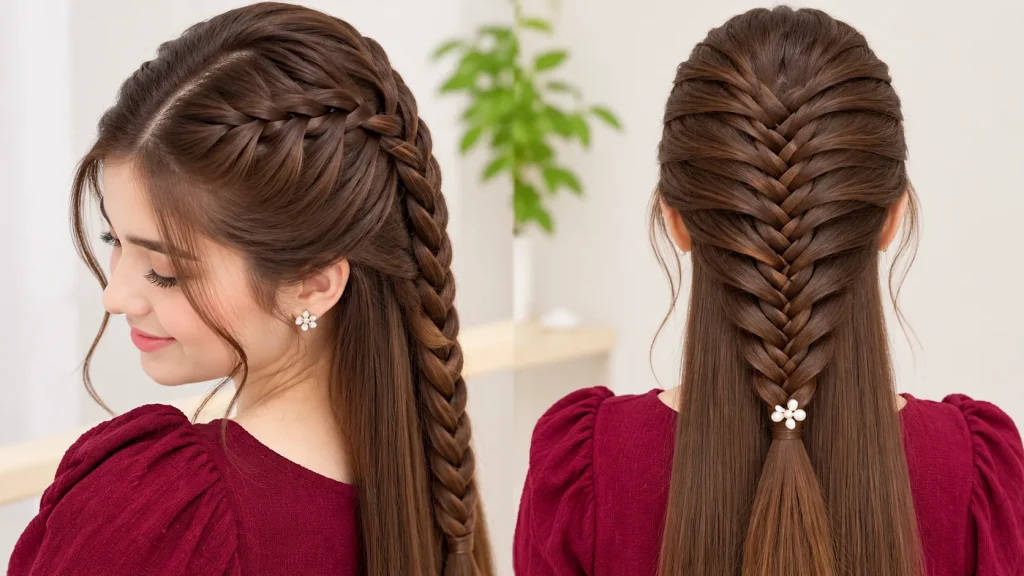
Zipper Braid
This one looks impressive, and it’s a fun challenge once you’ve mastered a regular French braid.
The zipper braid is a woven braid that runs down the center of the head. Small sections are added as you go, and the way the strands cross creates tight, interlocking ridges that look like a zipper’s teeth.
The crossing pattern is easier to learn by watching than by reading. Search for a zipper braid video tutorial and follow along slowly the first few times.
Because it sits close to the head, it tends to stay tidy. Great for students who hate flyaways.
Good for: medium to long hair, field trips, busy days.
Mini Bun Mohawk
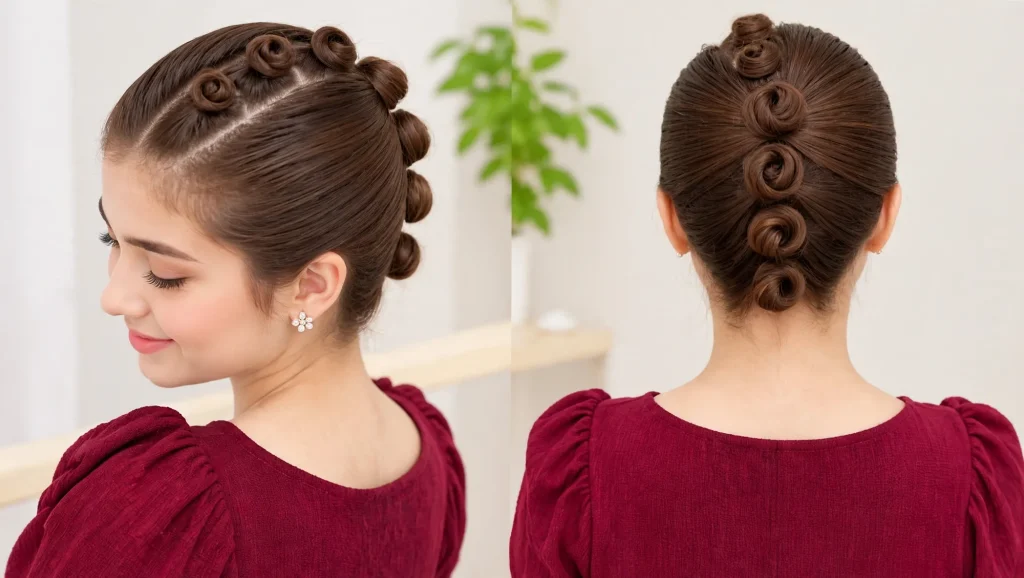
Picture three to five small buns running in a line from the forehead to the crown.
To make it, section a strip of hair down the middle of the head. Split that strip into small square parts. Twist each one into a tiny bun and secure it with an elastic and a pin.
Next, smooth the hair on both sides up toward the center row and secure it neatly with pins or small elastics. On shorter hair, a little styling cream helps keep the sides in place.
It’s playful and a little bold. Spirit week and school concerts are perfect excuses to wear it.
Passion Twists
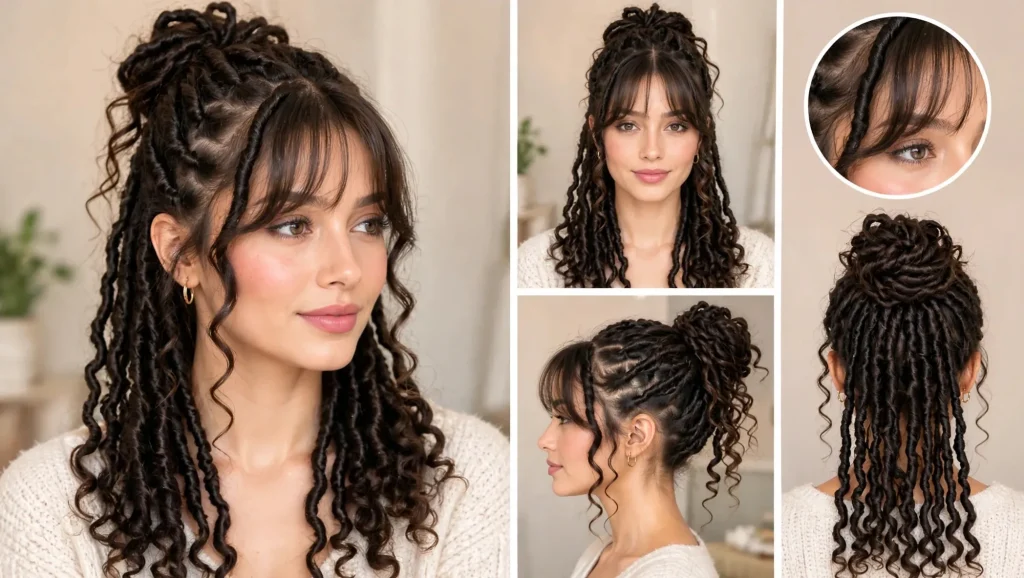
Passion twists are two-strand twists made with soft, wavy extension hair. They look light, bouncy and a little bohemian.
This is a stylist job for most families, and it’s a long appointment. Once they’re in, mornings get very easy. You shake them out, maybe tie them up, and go.
Passion twists can last several weeks, depending on how they’re installed and cared for. Follow your stylist’s recommended wear time, keep the scalp clean, and take them out sooner if you notice discomfort, heavy buildup or damage.
They look good up, down or in a half bun. Wrap them in a satin scarf at night so they stay soft.
Spiral-Wrapped Ponytail
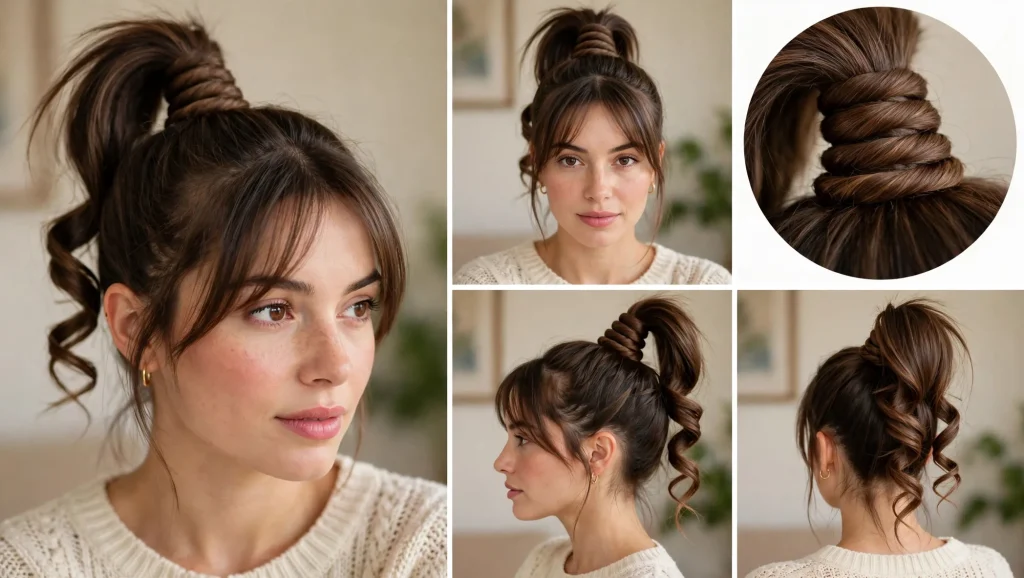
Here’s a plain ponytail with a simple, eye-catching twist.
- Make a ponytail at whatever height you like.
- Take a thin section from underneath the ponytail.
- Wrap it around the base a few times to hide the elastic.
- Keep wrapping it down the length of the ponytail in a loose spiral, leaving gaps between each wrap.
- Secure the end with a small clear elastic.
The result looks like a candy cane stripe made of hair. It takes about three minutes, and it’s an easy way to make a regular ponytail look finished.
French Braid Into a Ponytail
Some mornings call for something classic.
Start a French braid at the front hairline and braid it back, adding hair from both sides. Stop at the crown or just below it. Gather the rest of the hair and the braid’s end into a ponytail and secure.
The braid keeps front pieces off the face. The ponytail keeps the look easy to undo after school.
New to French braiding? Practice on a weekend first. By the third try, it gets much faster.
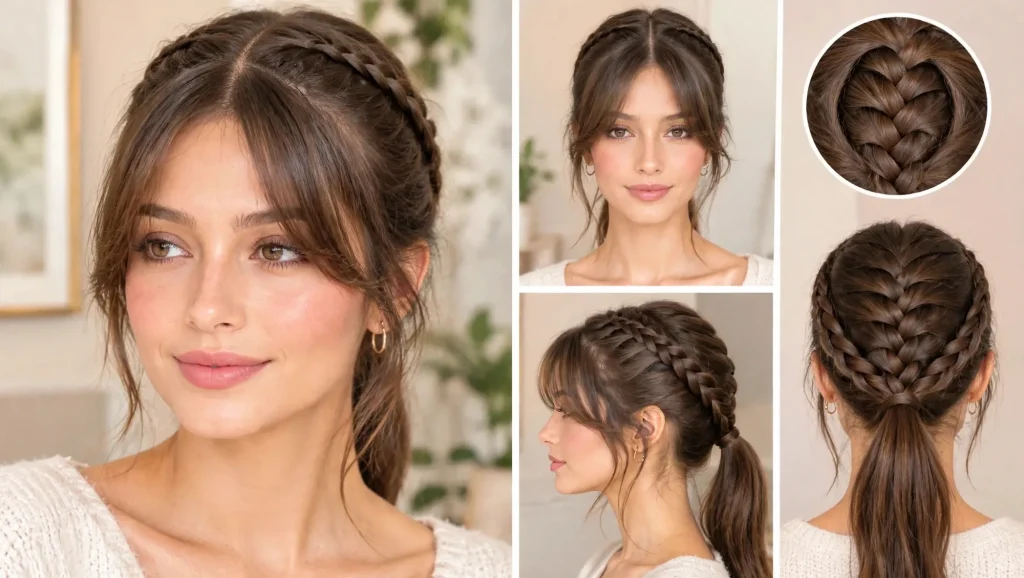
Cobra Braid Ponytail
This style uses the same square knot found in friendship bracelets and macramé.
Start with a ponytail and divide it into three sections. The middle section is the core and stays still. Then follow these steps:
- Cross the left section over the core and under the right section.
- Pass the right section under the core and bring it up through the loop on the left side.
- Pull both sections snug.
- Now mirror it. Cross the right section over the core and under the left section.
- Pass the left section under the core and up through the loop on the right side.
- Pull snug and repeat steps one to five down the ponytail.
Secure the end with an elastic. The finished braid looks chunky and woven, almost like a rope. A video tutorial helps a lot the first time.
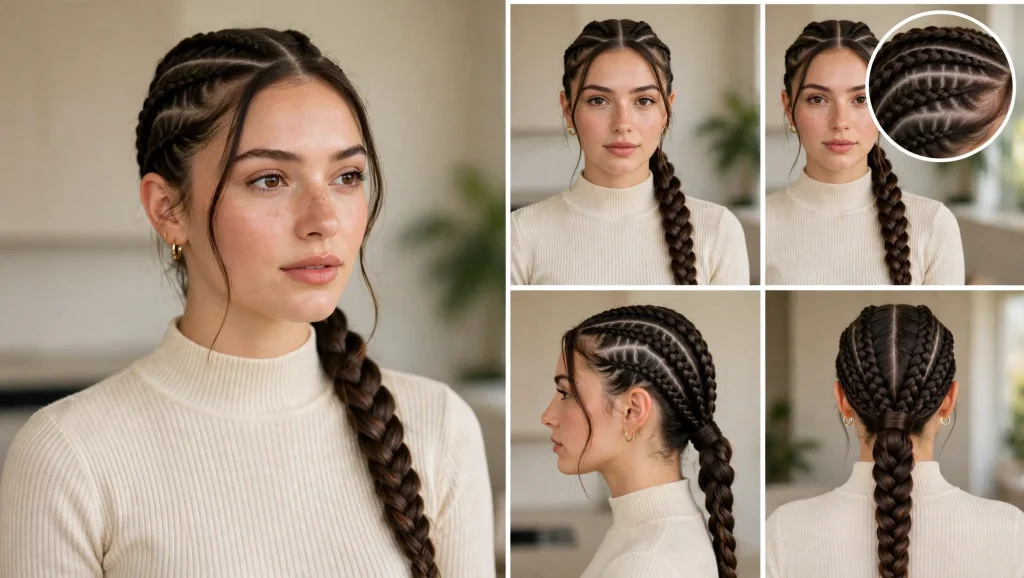
Pinwheel Bun
Need hair off your neck in a hurry? Try this one.
Make a ponytail with a strong elastic. Split it into four or five equal sections. Twist each section tightly and coil it around the base in the same direction, like the blades of a pinwheel. Pin each section securely as you go.
The finished bun has a pretty spiral pattern without much effort.
If you plan to wear it for PE or sports, test it at home first. Jump around a bit and make sure it stays comfortable and secure. Add extra pins if needed.
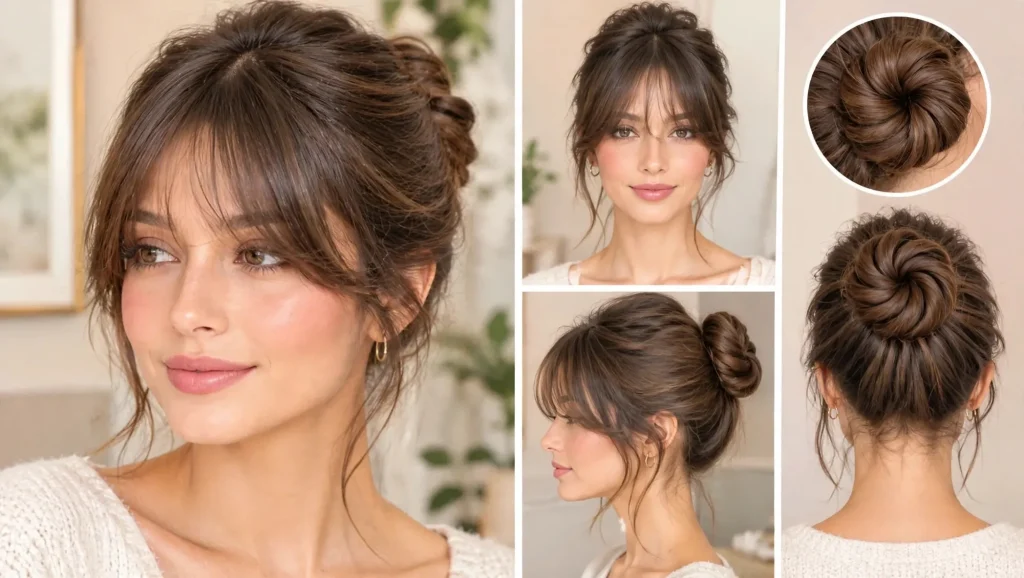
Flat Twists
Flat twists work beautifully on natural, coily and curly hair. They look smooth and tidy, and they help protect the ends.
Part a small section at the front. Split it into two strands and twist them over each other, picking up a bit of new hair from underneath as you move back, so the twist lies flat on the scalp. Continue to the nape and secure with a small elastic.
A few things to know:
- A leave-in or light cream that suits your hair helps keep twists smooth.
- Three to six large twists swept straight back is a good beginner look.
- Depending on your hair texture and how they’re done, flat twists can stay neat for several days.
Cover them with a satin scarf or bonnet at night. When they start to look fuzzy, untwist them for soft waves.
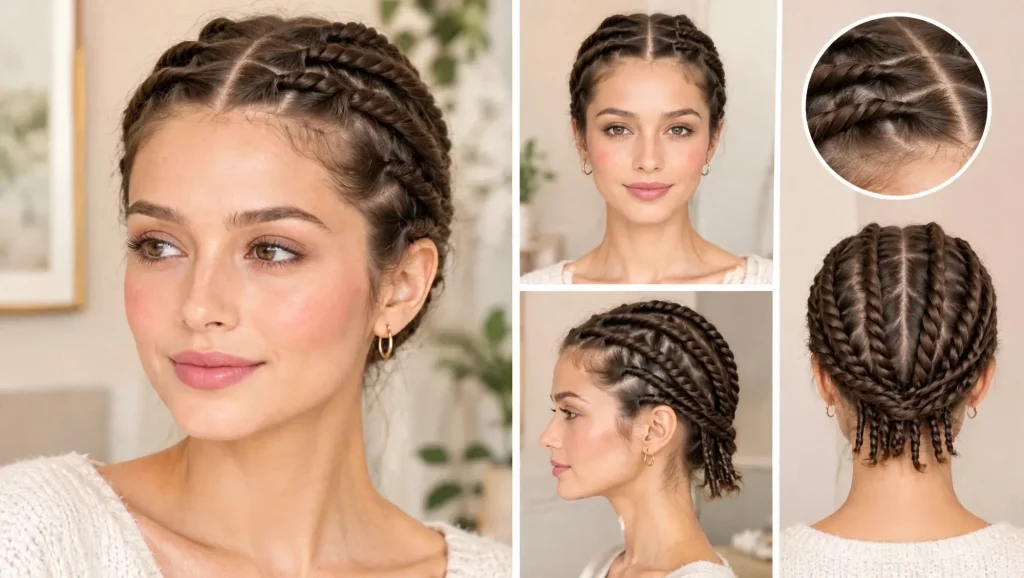
Feather Braid
The feather braid is a soft, delicate variation of the regular three-strand braid.
As you braid, small pieces are separated from the outer strands and worked toward the middle. They build a light, feathery pattern down the center that looks almost lacy.
Like the zipper braid, it’s much easier to learn from a short video than from written steps. Once you see the motion, it becomes simple.
Wear it as one braid down the back or as two side braids. On fine hair, gently loosen the edges for a fuller look.
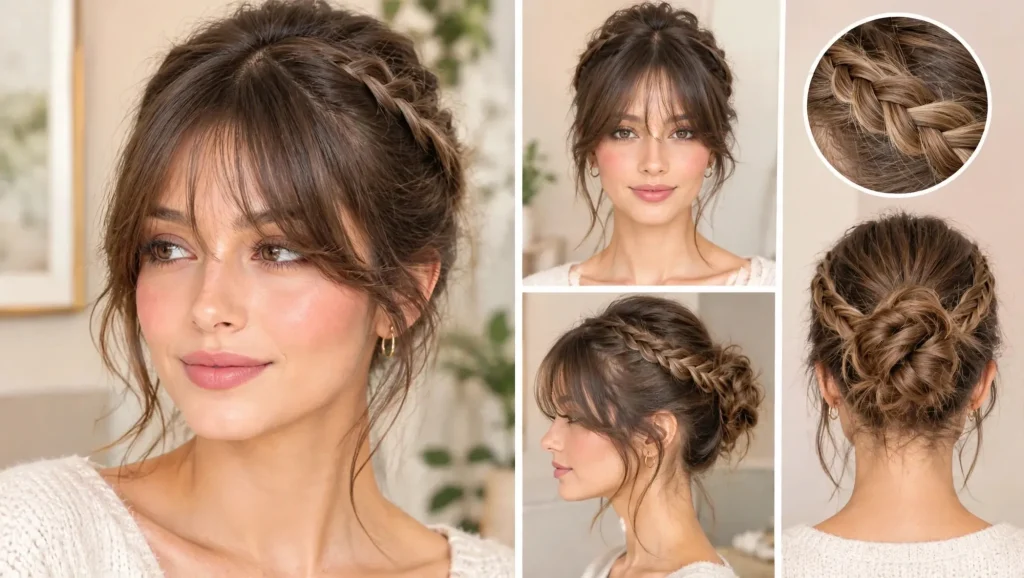
Lemonade Braids
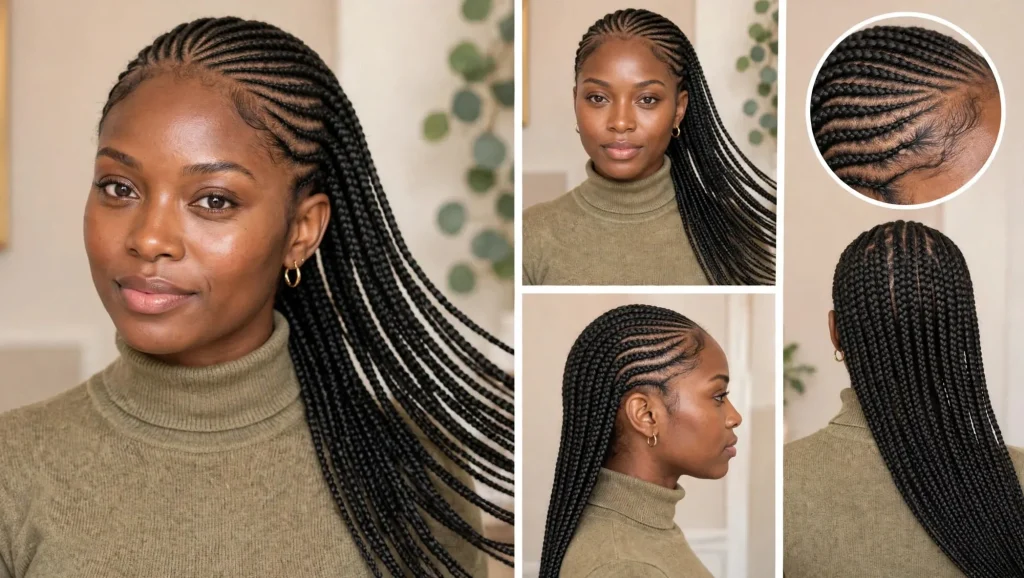
Lemonade braids are cornrows that sweep to one side of the head instead of straight back. The ends usually fall over one shoulder.
Most people have these done by a braider. Smaller braids look sleek and detailed. Larger ones are faster to install.
Once in, they need very little daily styling. Protect them with a satin scarf at night, cleanse your scalp as your braider recommends, and go easy on products so they don’t build up.
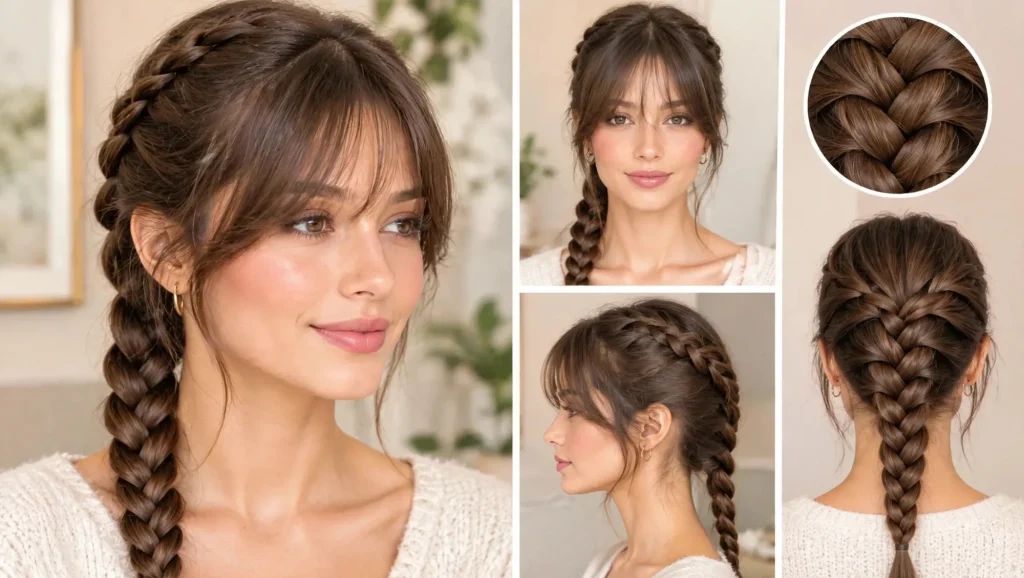
Five-Strand Braid
If three strands feel too easy, five is the fun next step. Number the strands one to five from left to right.
- Take strand one (far left) over strand two and under strand three.
- Take strand five (far right) over strand four and under the new middle strand.
- Keep repeating, always starting with whichever strand is now on the outside, alternating left and right.
- Secure the end with an elastic.
It creates a wide, flat, woven braid that really stands out.
For example, a student with long, thick hair might save this for an awards assembly. It looks dressy but feels comfortable all day.
Lace-Up Ponytail
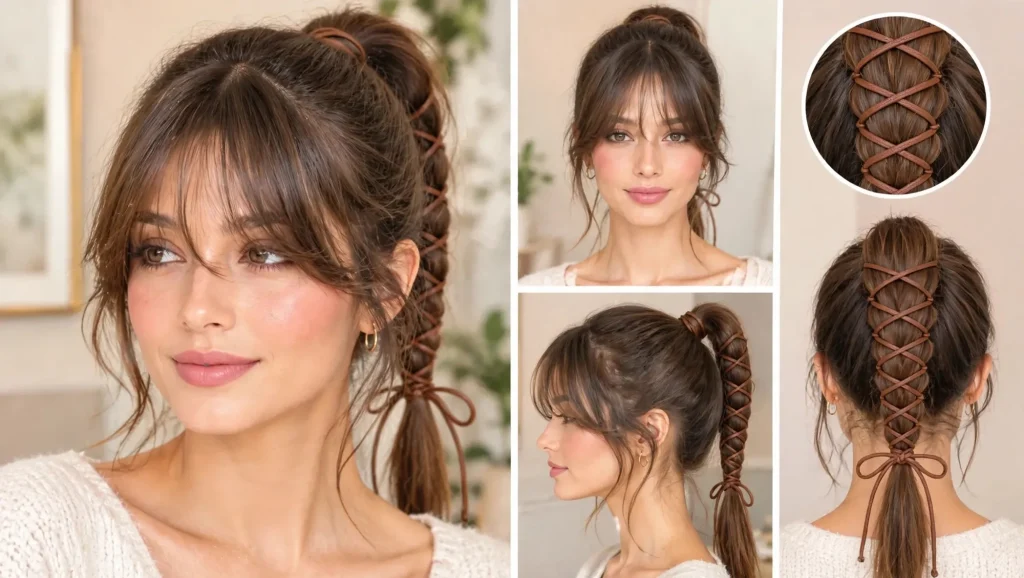
This style gives a plain ponytail a little detail, like the laces on a sneaker.
After making your ponytail, take two thin sections from either side of it. Cross them around the ponytail in a repeating crisscross pattern, securing each cross with a tiny clear elastic or a discreet pin. Continue toward the ends.
It takes about three minutes once you’ve done it a couple of times. It also hides frizzy bits on humid days.
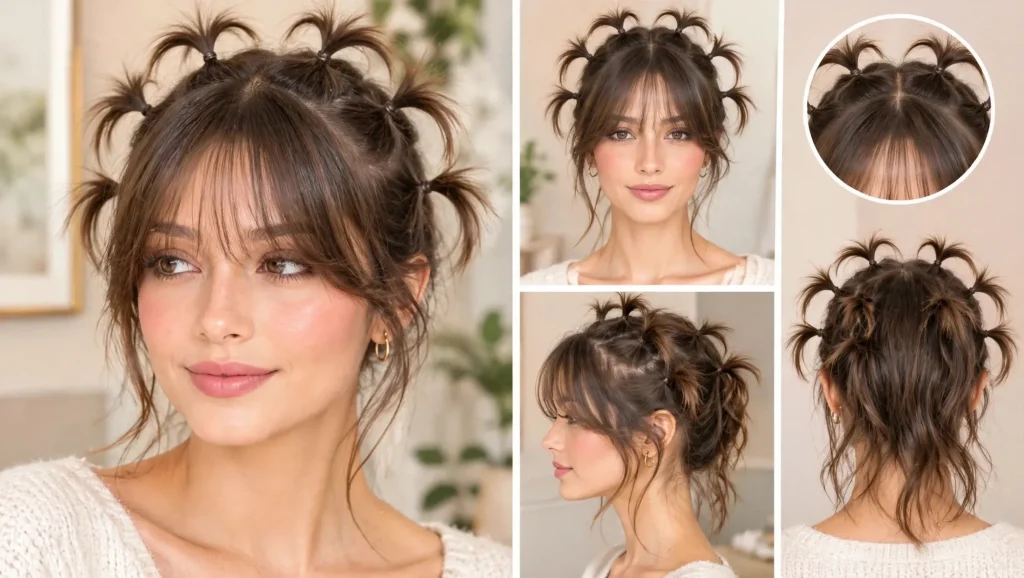
Mini Ponytail Crown
This is a sweet one for younger kids, though teens can wear it too.
Make a tiny ponytail at one temple. Then make the next small ponytail a little further back along the hairline, adding the tail of the previous ponytail into it. Keep going, each new ponytail taking in the last one. Stop near the back of the head and secure the final section with an elastic.
From the front, it looks like a little tiara made of hair. It’s great for kids who need hair out of their eyes but dislike tight updos.
Basket Weave Updo
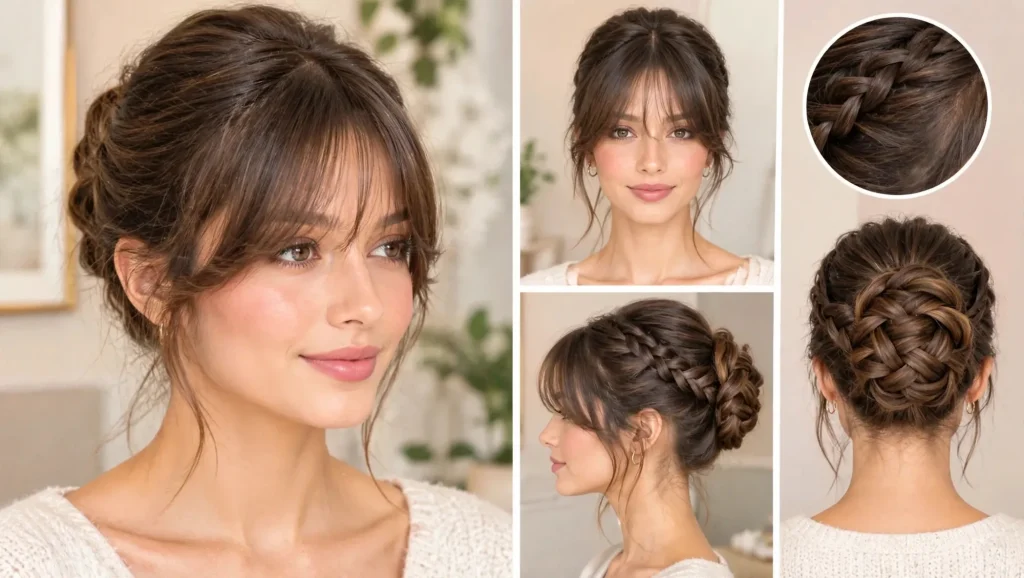
Save this one for a weekend practice session before trying it on a school morning.
Section the hair horizontally from the top of the head to the nape. Braid or twist small pieces from each section, then weave them over and under each other in a crisscross pattern across the back. Pin the ends neatly at the nape.
The finished look resembles a woven basket. It’s perfect for school dances, formal photos or a special event.
With secure pinning and a careful nighttime routine, it may still look presentable on day two, though you might need a few touch-ups.
Stitch Braids
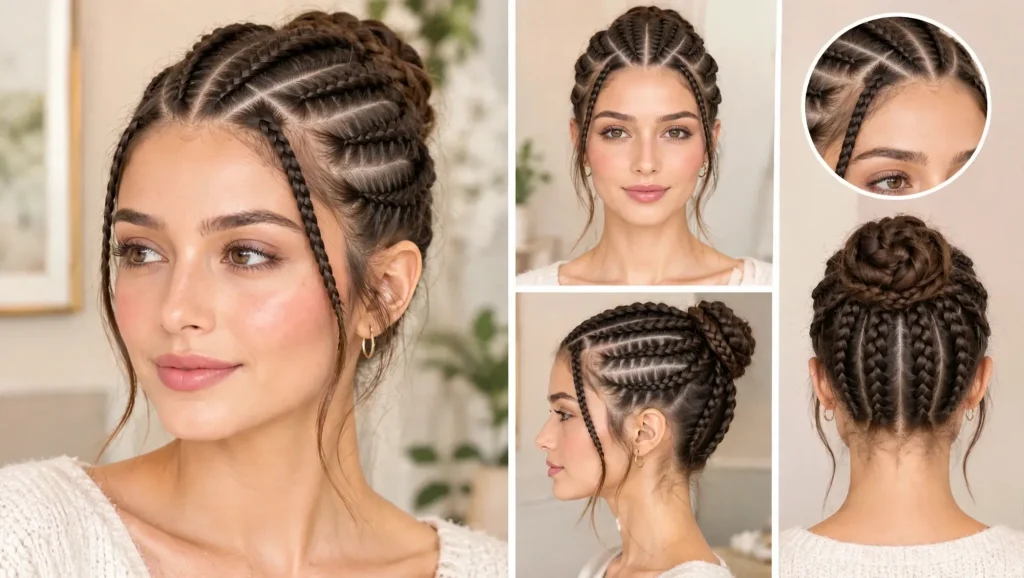
Stitch braids are a cornrow variation made with a feed-in technique. The braider adds small amounts of hair while creating evenly spaced horizontal partings, which give each braid its neat, stitched look.
This is definitely a job for an experienced braider. The partings take skill and patience.
They’re usually braided straight back toward the nape. Once in, they need very little morning effort. A satin scarf at night keeps them looking fresh.
A Quick Note on Protective Styles for Kids
Passion twists, lemonade braids and stitch braids are popular for good reason. But comfort always comes first.
A protective style should never cause pain, headaches, bumps or heavy pulling around the hairline. If a child complains or you notice any of these, speak to the stylist straight away. Gentle tension protects the edges in the long run.
Mistakes That Make School Hair Fall Apart by Lunch
Even good school hairstyles can fail if a few small things go wrong.
Starting with tangled hair. Braids and twists show every knot. Detangle first.
Using the wrong elastics. Thin rubber bands can snag and break hair. Soft, coated elastics are gentler and hold well.
Going too tight. Tight feels secure but can cause headaches and strain the hairline. Snug is enough.
Using the wrong amount of product. Some hair needs a little cream or gel to hold. Fine hair can get weighed down quickly. Start small and adjust.
Trying a brand-new style on a rushed morning. Practice trickier styles on weekends. School days are for styles your hands already know.
Forgetting school rules. Some schools have guidelines on hair accessories or how long hair must be tied back for sports or science labs. Check before choosing a style.
Matching a Style to the School Day
Still not sure which to try? These pairings might help.
- PE or sports practice: French braid into a ponytail or a well-pinned pinwheel bun. Test it at home first.
- Picture day: feather braid, five-strand braid or freshly done stitch braids.
- Spirit week: mini bun mohawk or cobra braid ponytail.
- Field trip or long day out: passion twists or lemonade braids, as long as they were installed before the week started.
- Rainy, humid week: flat twists or the lace-up ponytail to help control frizz.
- Younger kids who wiggle a lot: the mini ponytail crown or spiral-wrapped ponytail. Quick and painless.
Frequently Asked Questions
What are the easiest hairstyles for school mornings?
The spiral-wrapped ponytail, lace-up ponytail and pinwheel bun are the quickest here. The French braid into a ponytail joins them once you’ve had a little practice.
Which school hairstyles last more than one day?
Protective styles last the longest, though wear time depends on installation and care. Flat twists can stay neat for several days, and the basket weave updo may last into a second day with careful sleeping.
How can I stop hair from coming loose during the day?
Start with detangled hair and use a product that suits your hair type, if needed. Choose soft, strong elastics and add pins where sections feel loose. Styles that sit close to the head usually hold up better, but no style is guaranteed through every activity.
Are protective styles okay for kids?
Many families choose them. The key is gentle tension, a clean scalp and following the stylist’s advice on how long to keep them in. Remove the style if it causes pain or irritation.
Can these styles work on short hair?
Some can. The mini bun mohawk and mini ponytail crown work on hair that reaches the chin. Flat twists suit shorter natural hair well. Longer braids like the five-strand braid need more length.
Start With One Tomorrow Morning
You don’t need to learn all 15 at once. Pick one that suits your hair and your morning, and practice it this weekend. By Monday, it’ll feel much easier.
Once one style feels natural, add another. Before long, you’ll have your own small collection of hairstyles for school, and that 7:42 panic will feel a lot calmer.